I must admit, I love crafting.
But, only if it’s fast and easy (keep your mind in the gutter, we’re still talking crafting here).
I love crafting so much that I have boxes of stuff just tucked away for my next “big craft idea”. The thing is, I hate projects that take too long to do. So, I end up quitting mid-project or never starting, because I fear it’ll take too long.
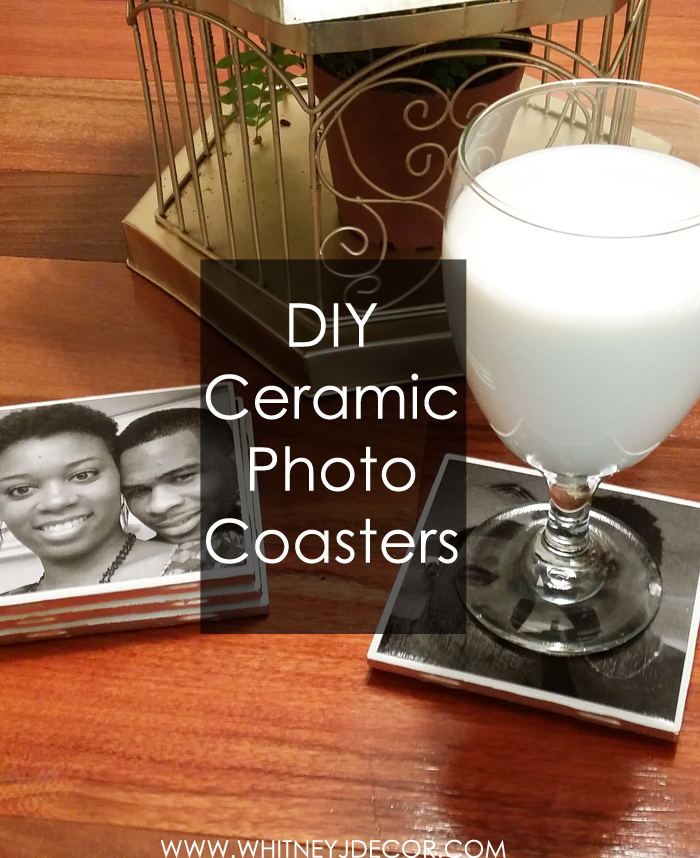
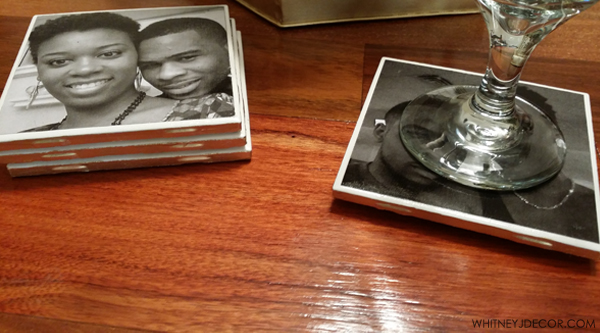
These ceramic photo coasters can be done in no time and would great wherever you decide to use them!! They’re also really fun to do, too!
***** SIDE NOTE: I saw a photo coaster online sometime before and always knew that I could make it myself. I didn’t use anyone else’s tutorial when creating these, because I couldn’t find the one that I saw before. But, I’m sure a lot of people make these the same way. Okay, as we were…*****
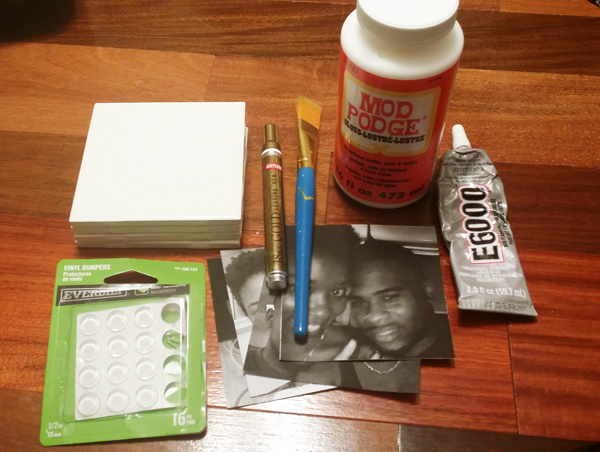
Here’s what you need:
- white ceramic tiles (mine are 4.5″ square from Home Depot – just $.13 a piece)
- glossy mod podge
- gold paint (I used an 18K gold paint marker from Michael’s)
- glue (I love E6000)
- vinyl bumbers (for the bottom of your coasters to protect your furniture – you can also glue felt circles onto the bottom instead)
- paint brush
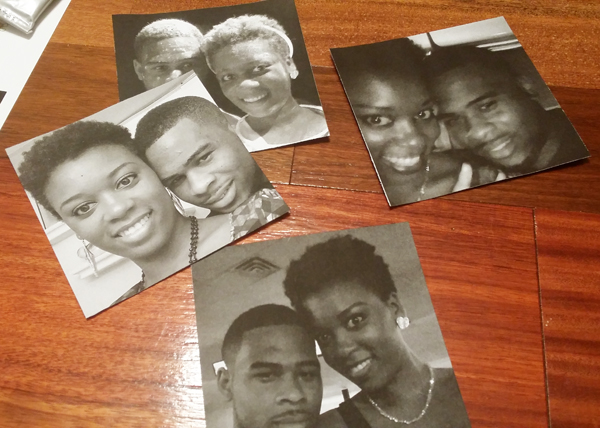
- photos to the size of your tiles (I printed mine in black and white at 4″ square so that some of the tile shows)
How to make your DIY ceramic photo coasters:
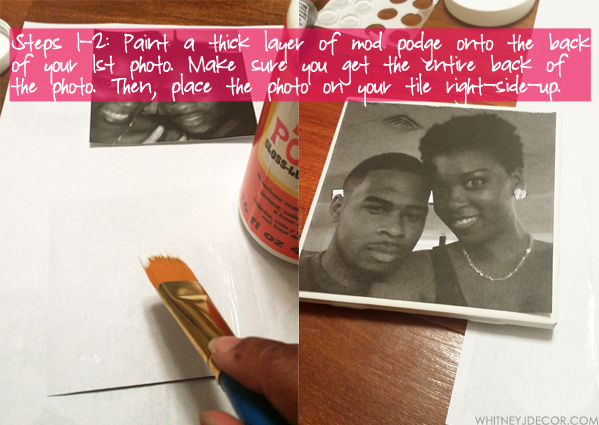
- Paint a thick layer of mod podge onto the back of your 1st photo. Make sure you get the entire backside of the photo. Then, place the photo on your tile.
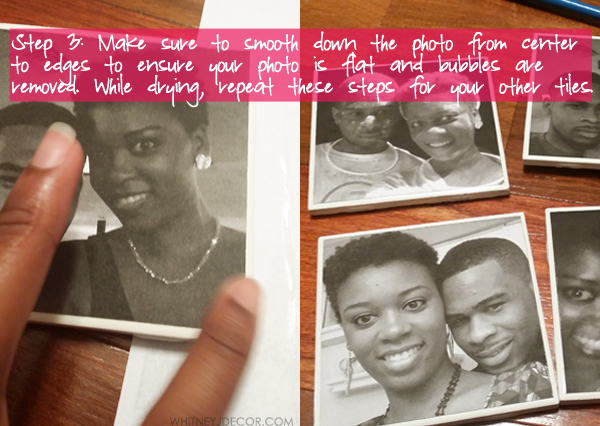
- Smooth the photo from center to edges to make sure that your photo is completely flat on the tile and that bubbles are removed. While your photo dries on the tile, repeat these steps for the rest of your coasters.
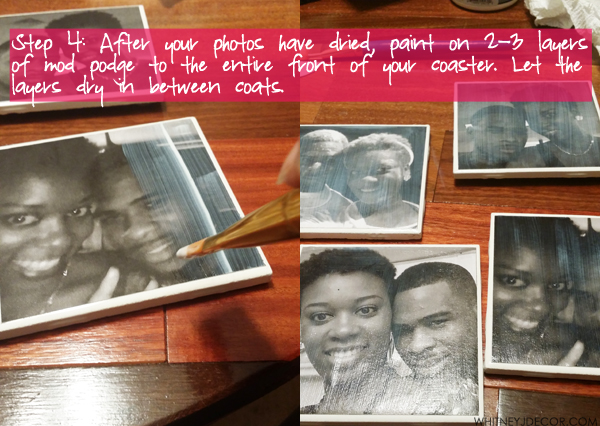
- After your tiles have dried, paint on 2-3 layers of mod podge onto the entire front of the photos. Make sure to let the tiles dry in between coats.
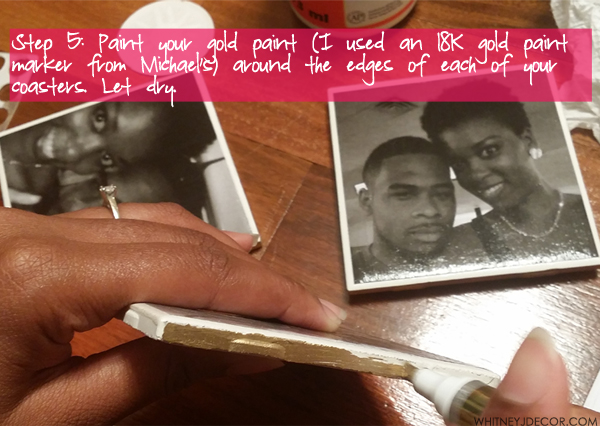
- Apply your gold paint around the edges of each of your coasters (I used an 18K gold paint marker from Michael’s), but you can also use a paint brush and acrylic paint in the bottle.
- (Not pictured) Glue your vinyl bumpers to the bottom of your coasters. You can also use felt dots instead.
- Place on your coffee table, dresser, side table, night stand, countertop, or wherever you can show off your new project! Enjoy!
These coasters would be so cool as a gift to your parent or grandparents!
What do you think of these DIY ceramic photo coasters? Look easy enough? If you tackle these on your own, please share photos on your social sites with hashtag #whitneyjdecorDIY
Till next time,
![]()


This is such a great idea and so easy!! Thanks for the inspiration!
Hey Carolyn! Thanks so much!
Whitney
Love, love , love this idea!! What a great gift this would make. Thanks for linking up at the Home Matters Linky Party!
~Bonnie
Hey Bonnie!!
Thanks a bunch. I do think these coasters would make awesome gifts!
Whitney