
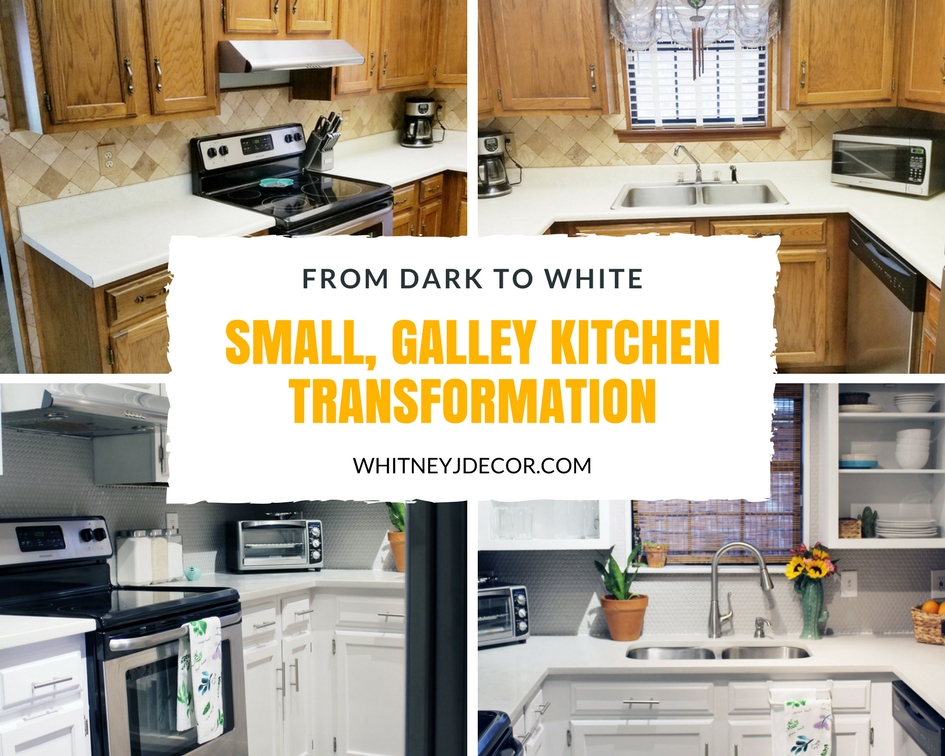
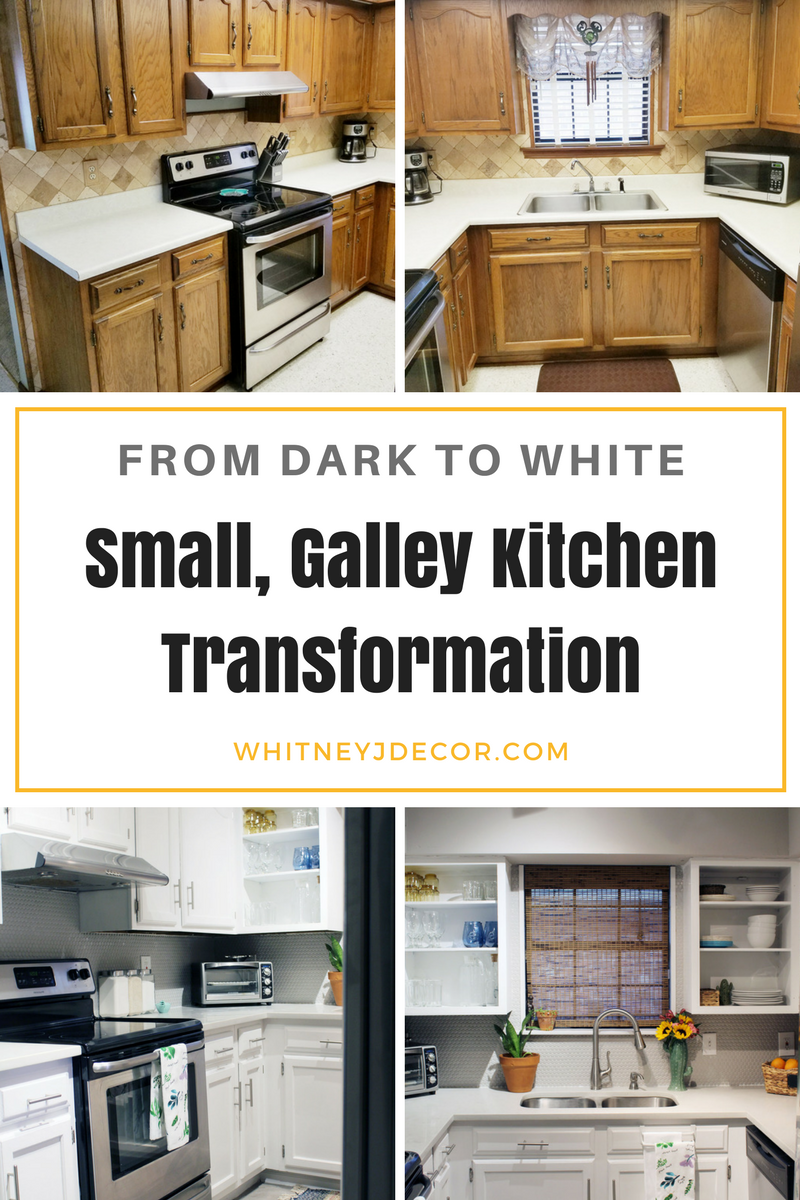
Ayeeeeee, the kitchen is finally ready for its closeup! LOL!
Ya’ll! Y’all don’t know what I went through to get this kitchen reveal to you. I’ve been through the wire with this kitchen. To the point where I was like, “just throw the whole house away”. We had so many issues with removing the dropped ceiling, trying to remove the soffit, taking down the old stone tile backsplash (and completely destroying the walls), getting new drywall, cutting the floor tiles, and painting the cabinet doors.
There were a lot of issues that we had with the contractor and a lot of work that still haven’t been completed, but I’ll wait until later to explain all those issues when I write about how to have a successful homeowner-contractor relationship in a later post.
Even though I had some issues during the process, my kitchen is the perfect example of how you can get a new look without getting new cabinets or changing the layout of the kitchen.
Now, onto the reveal… but let’s start with some before pictures, shall we…

So, the kitchen was supposed to be done during this past One Room Challenge, but it’s better late than never, right? I’ve made some big changes here! Here’s what it looks like now!
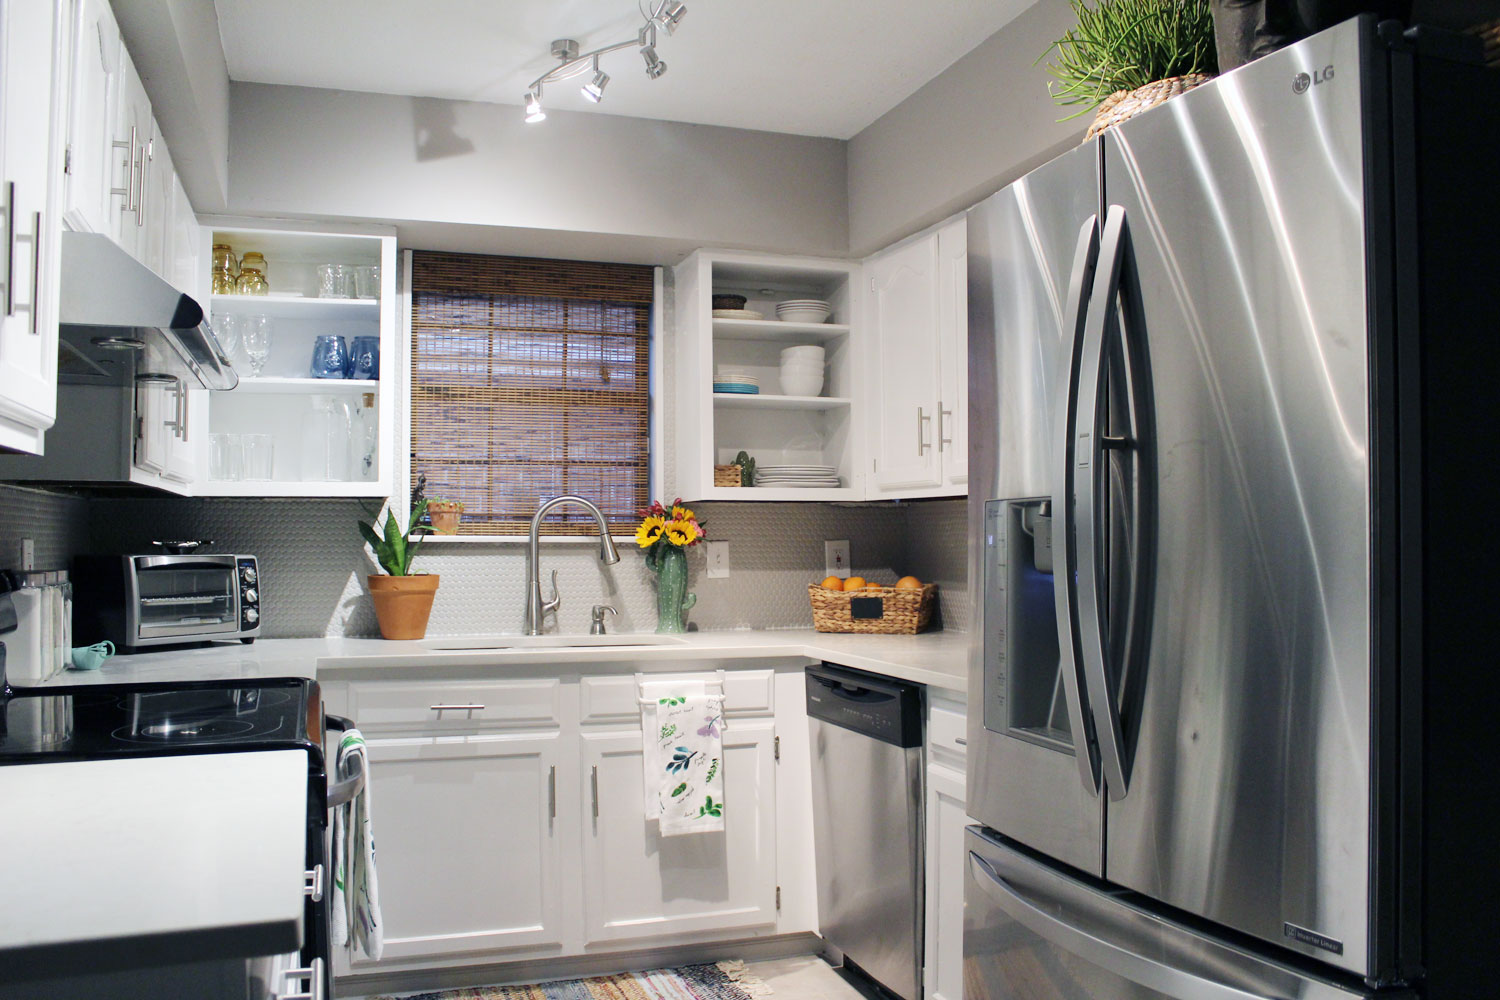
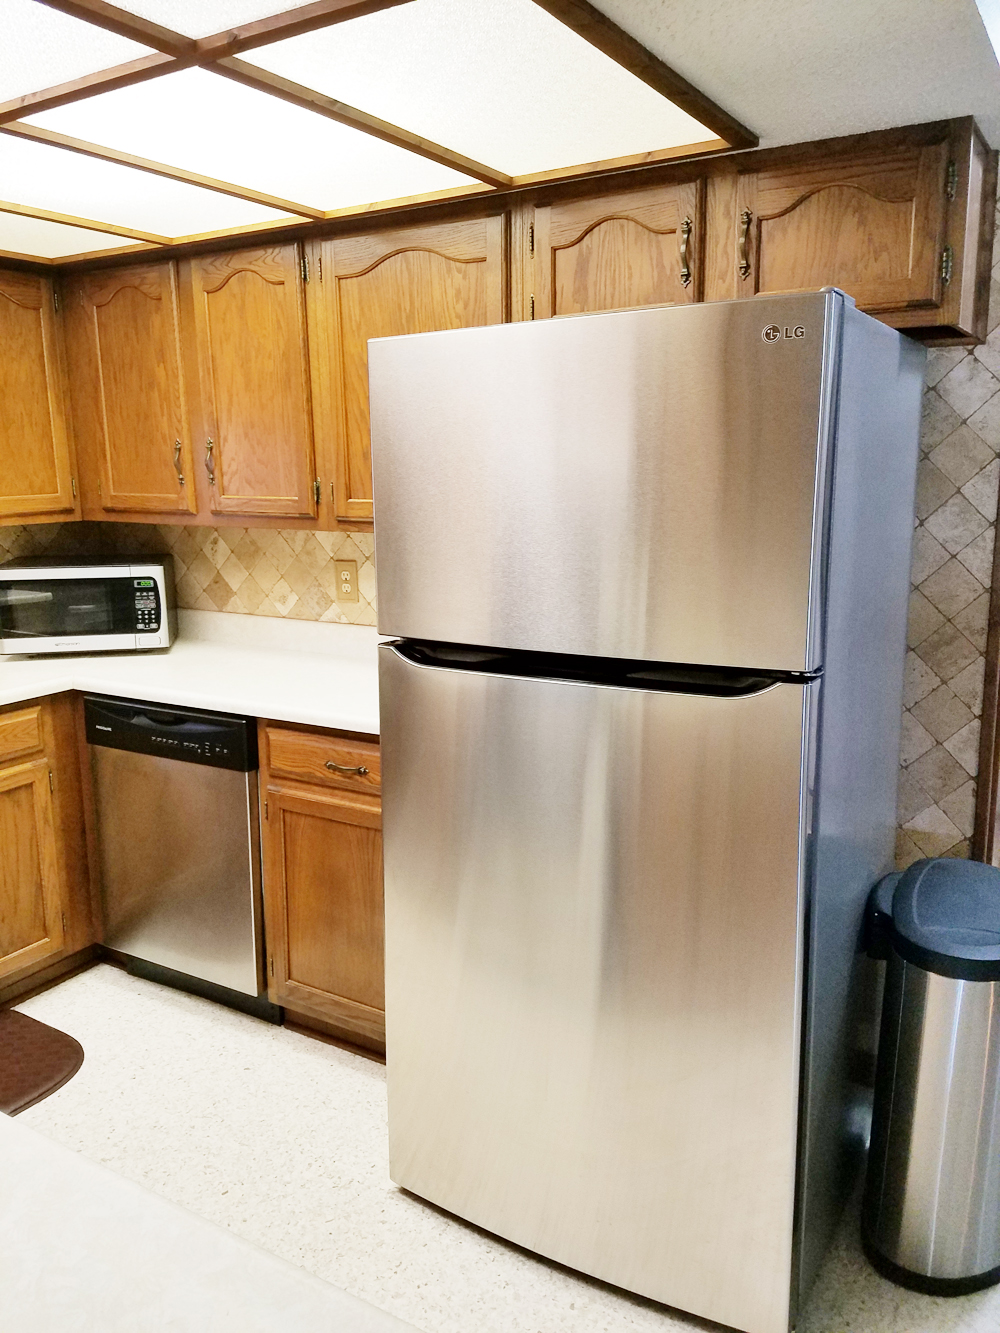
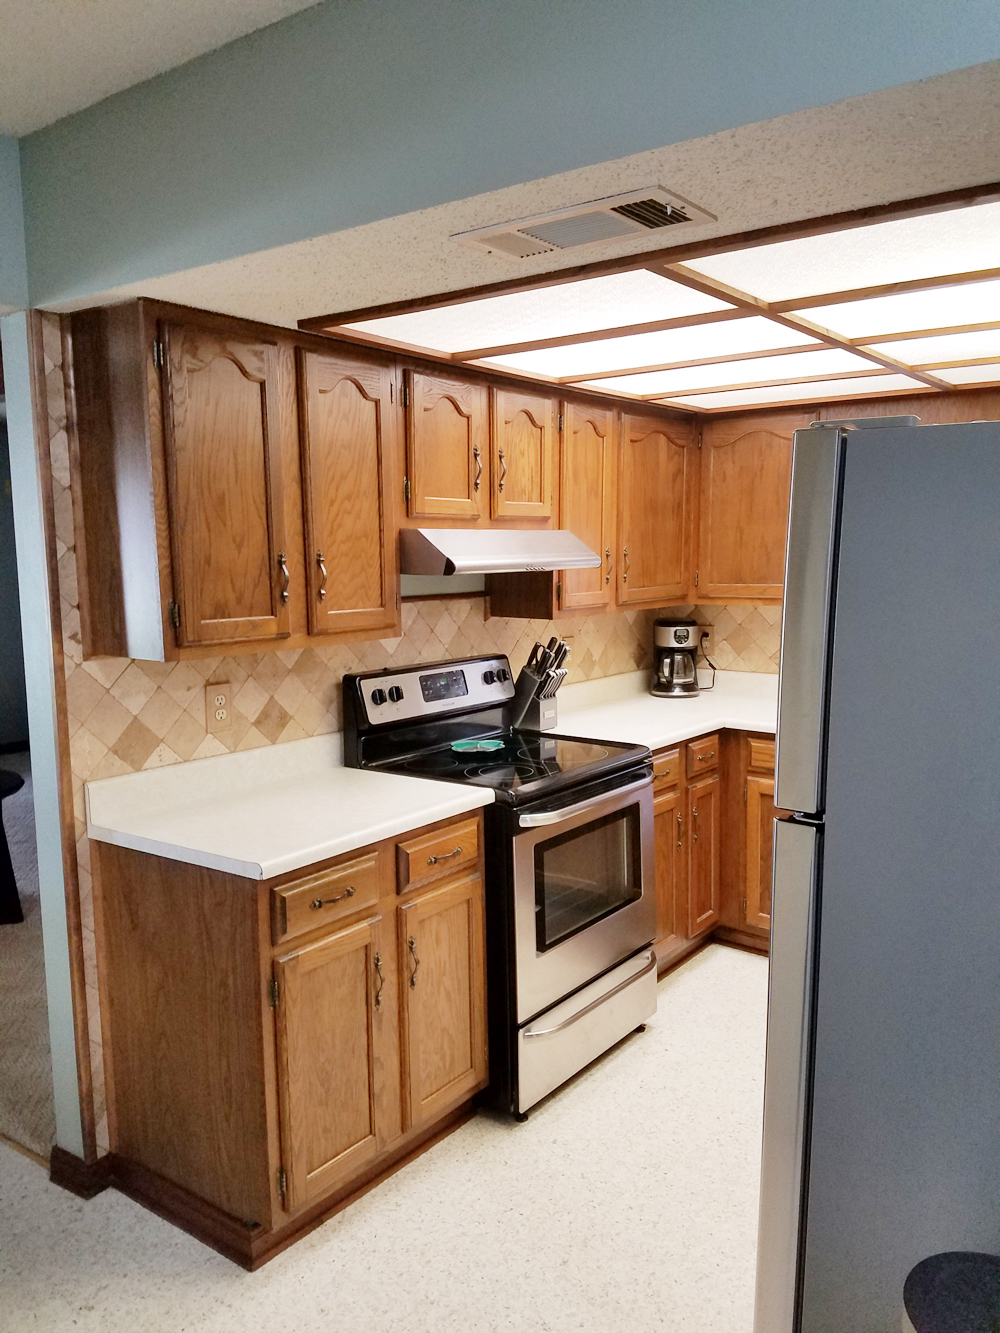
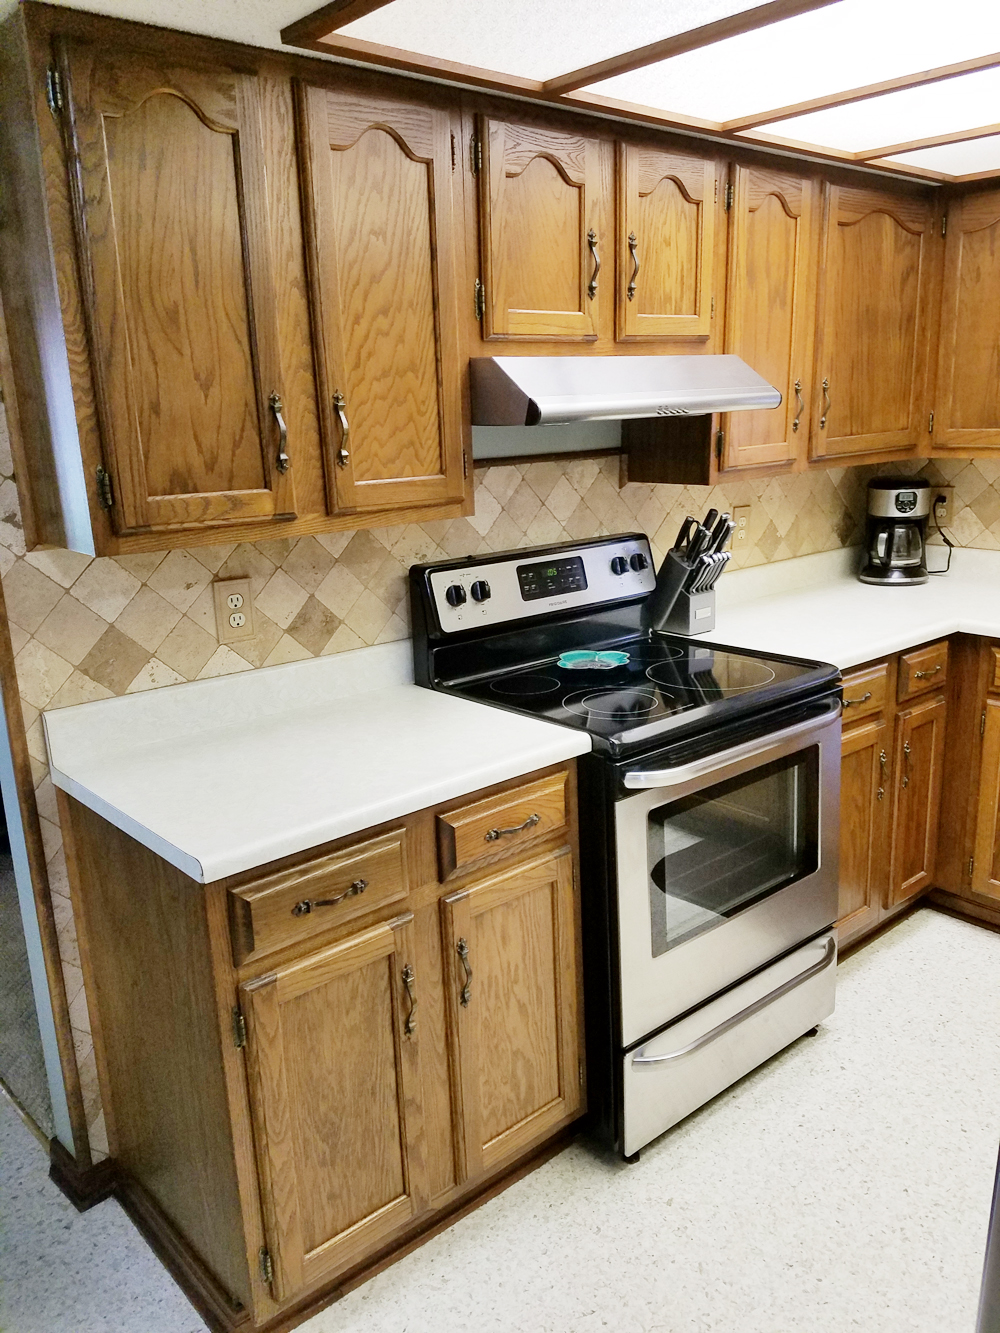
Before, our small galley kitchen was REALLY ugly and the dark wood cabinets and dropped ceiling made it feel even smaller. Why do people want shorter ceilings again??
One day we’ll remove the soffits and get taller cabinets, but for now we’re sticking with just keeping the cabinets, since it was a lot less expensive to just paint the cabinets.
I opted to go bright white with the paint, using Amy Howard’s Ballet White chalk paint. Ace Hardware sent it to me to try. Ace is always my first choice when I’m looking for a fun, new DIY project to try, because I always get the best, most knowledgeable help from the associates. I had some issues with the paint on my cabinets, because the paint is supposed to be a “one step – no sanding, no stripping, and no priming” paint, but didn’t work that way for me. My cabinets are really old, from the 80s, and probably should have at least been sanded down a little bit. So, now, even with the new paint, you can see a lot of the wear and tear of the cabinets. The good news is that the Amy Howard’s chalk paint is still great paint and I’m going to show you how I used it – the correct way – to transform a small, old secretary desk for my outdoor garden area.
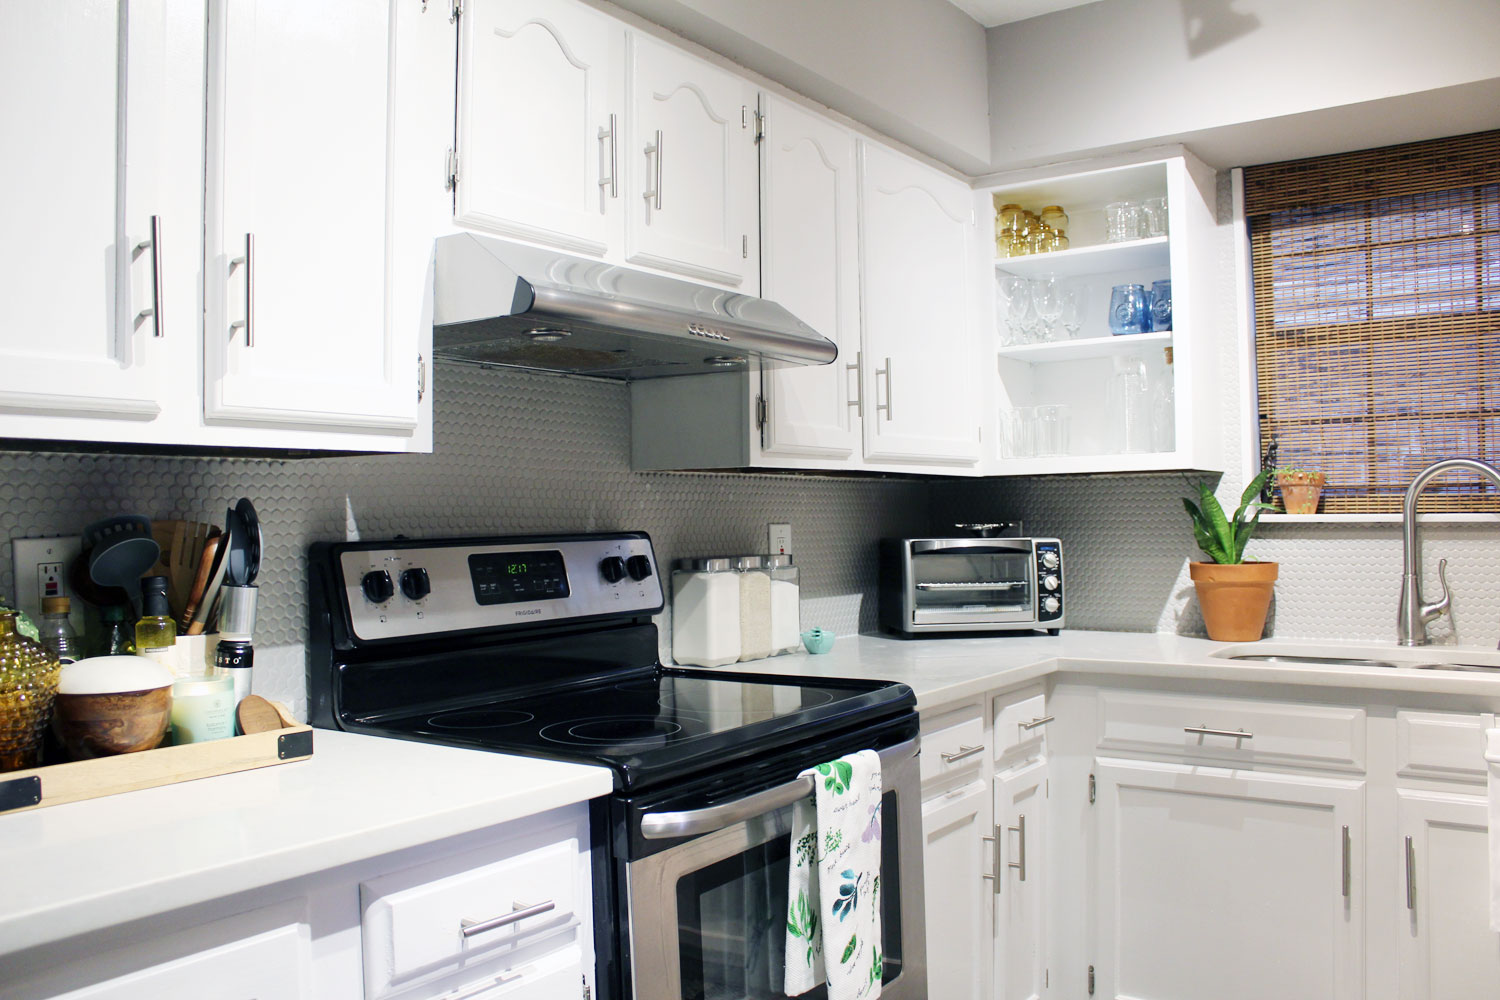
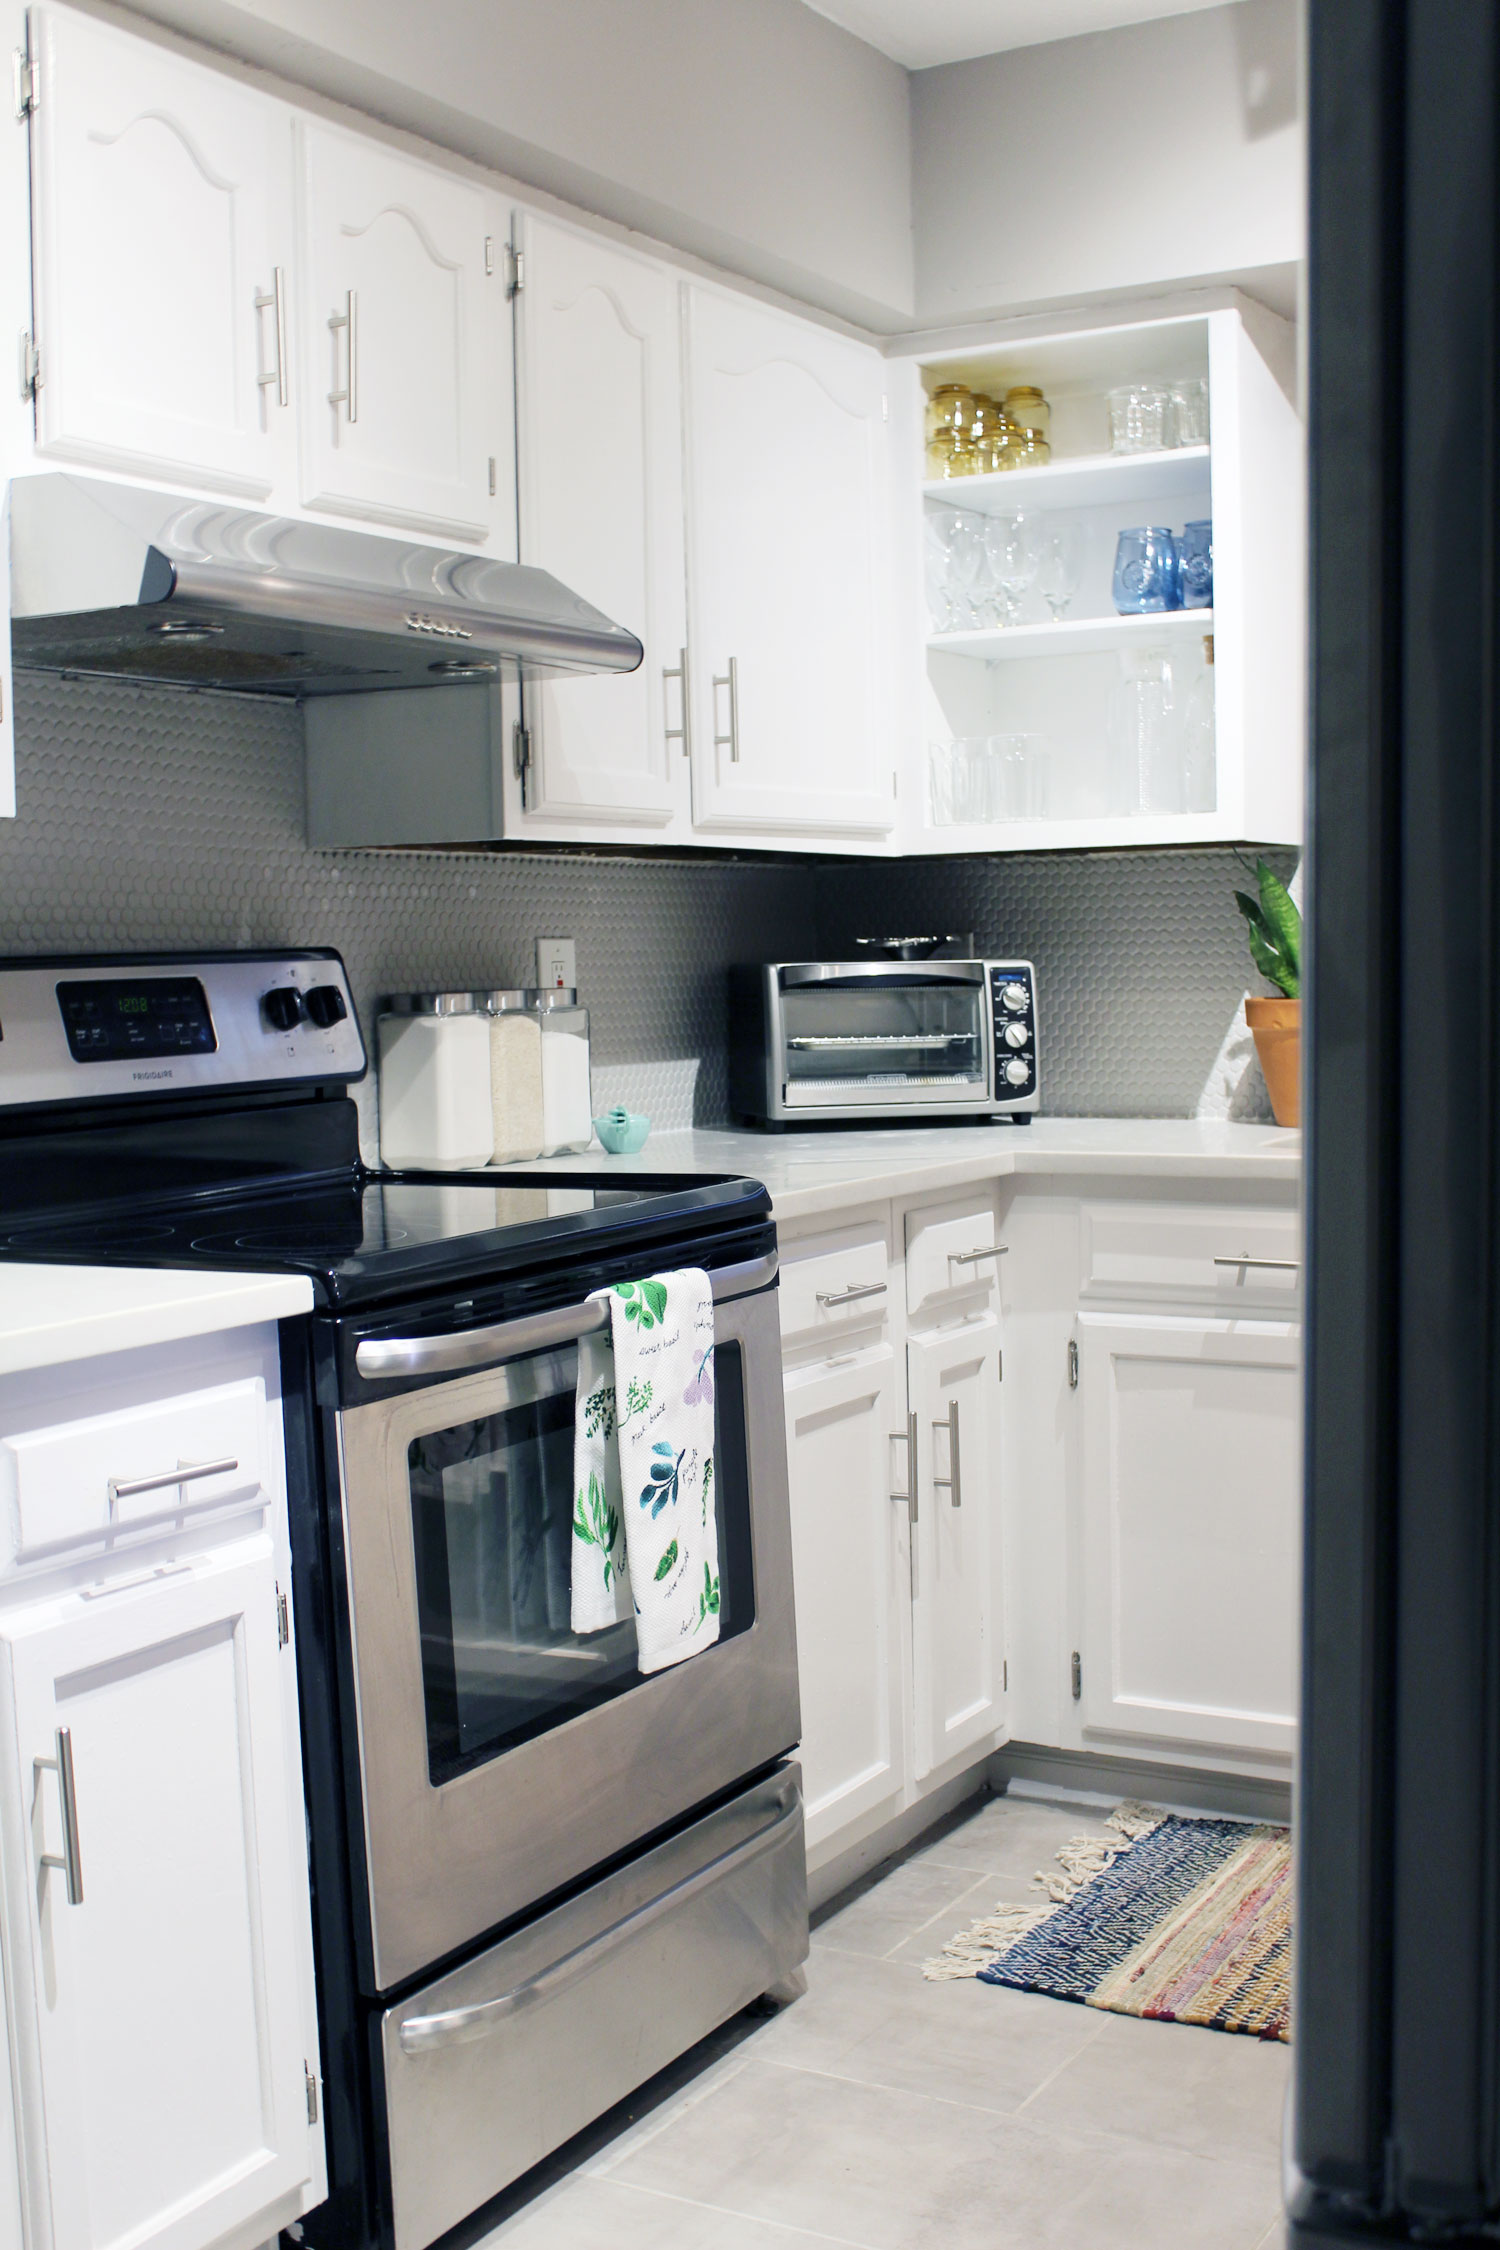
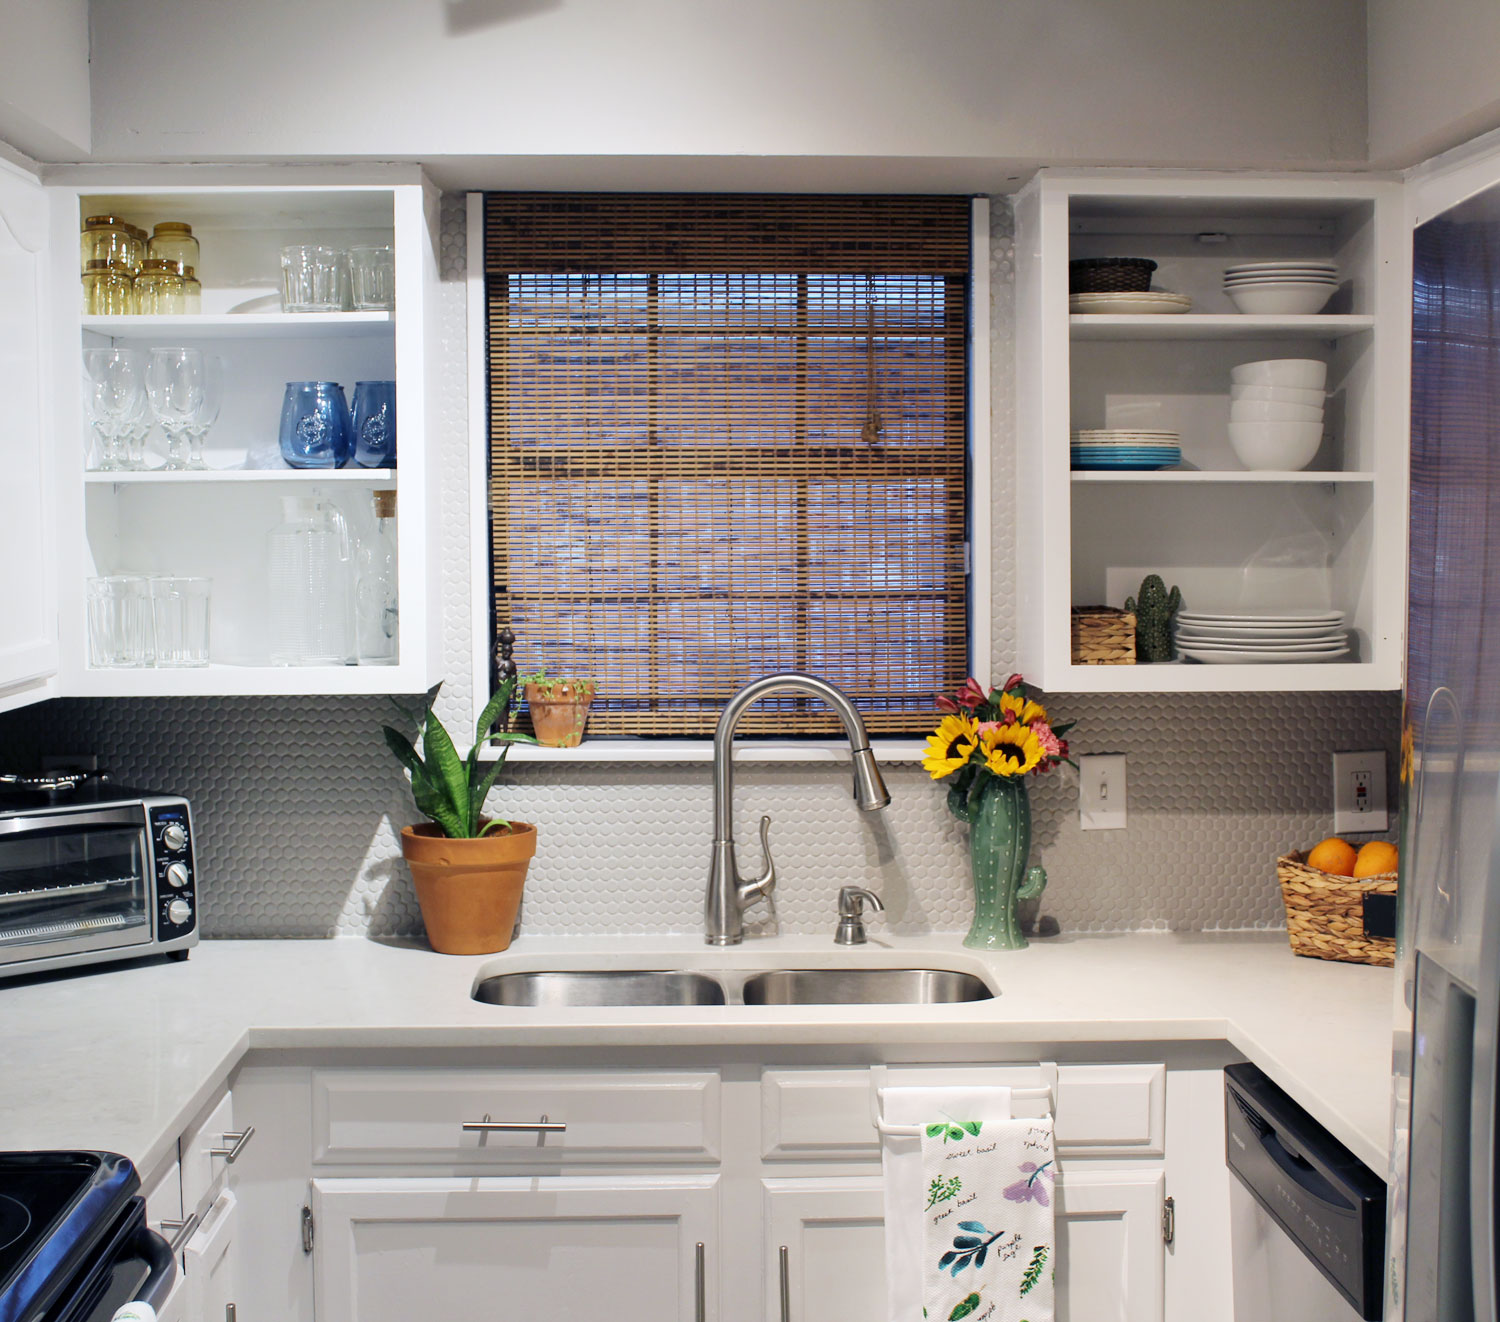
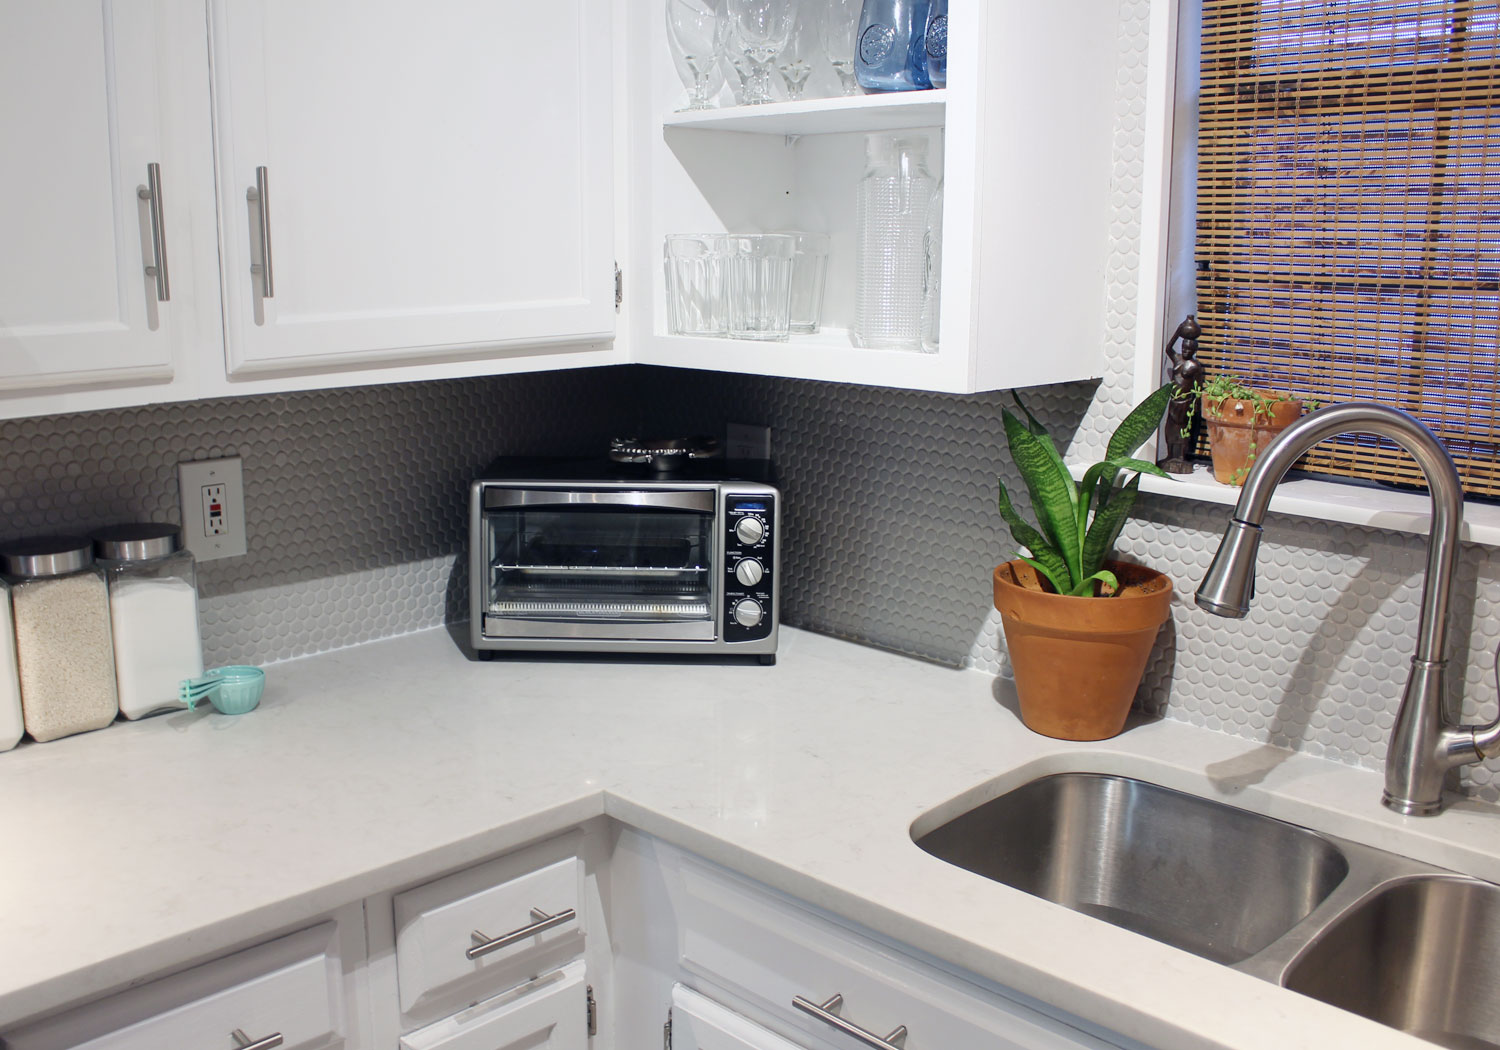
Besides painting the cabinets, I opted to remove the doors off the two upper cabinets that you’re facing when you walk into my kitchen. I dreamed of having open storage for some of my glassware and some cute accessories. Removing the cabinet doors also opened up the kitchen a little bit more. Expect to see me use those cabinets as a good opportunity to switch up decor for the different seasons, because I really hate having too many unnecessary items on the countertops.
I would usually never be up for such a white kitchen, but we have terrible lighting in our home. Our window in the kitchen is on the side of the house, which is really close to our neighbors, which means we don’t get much sun in the kitchen (which also means it is really, REALLY, hard to photograph the kitchen).
Our kitchen opens up to our dining room, which has no windows, and our living room, which has two french doors. The french doors also don’t bring in much light, because they open up to our patio, which is also very, very dark.
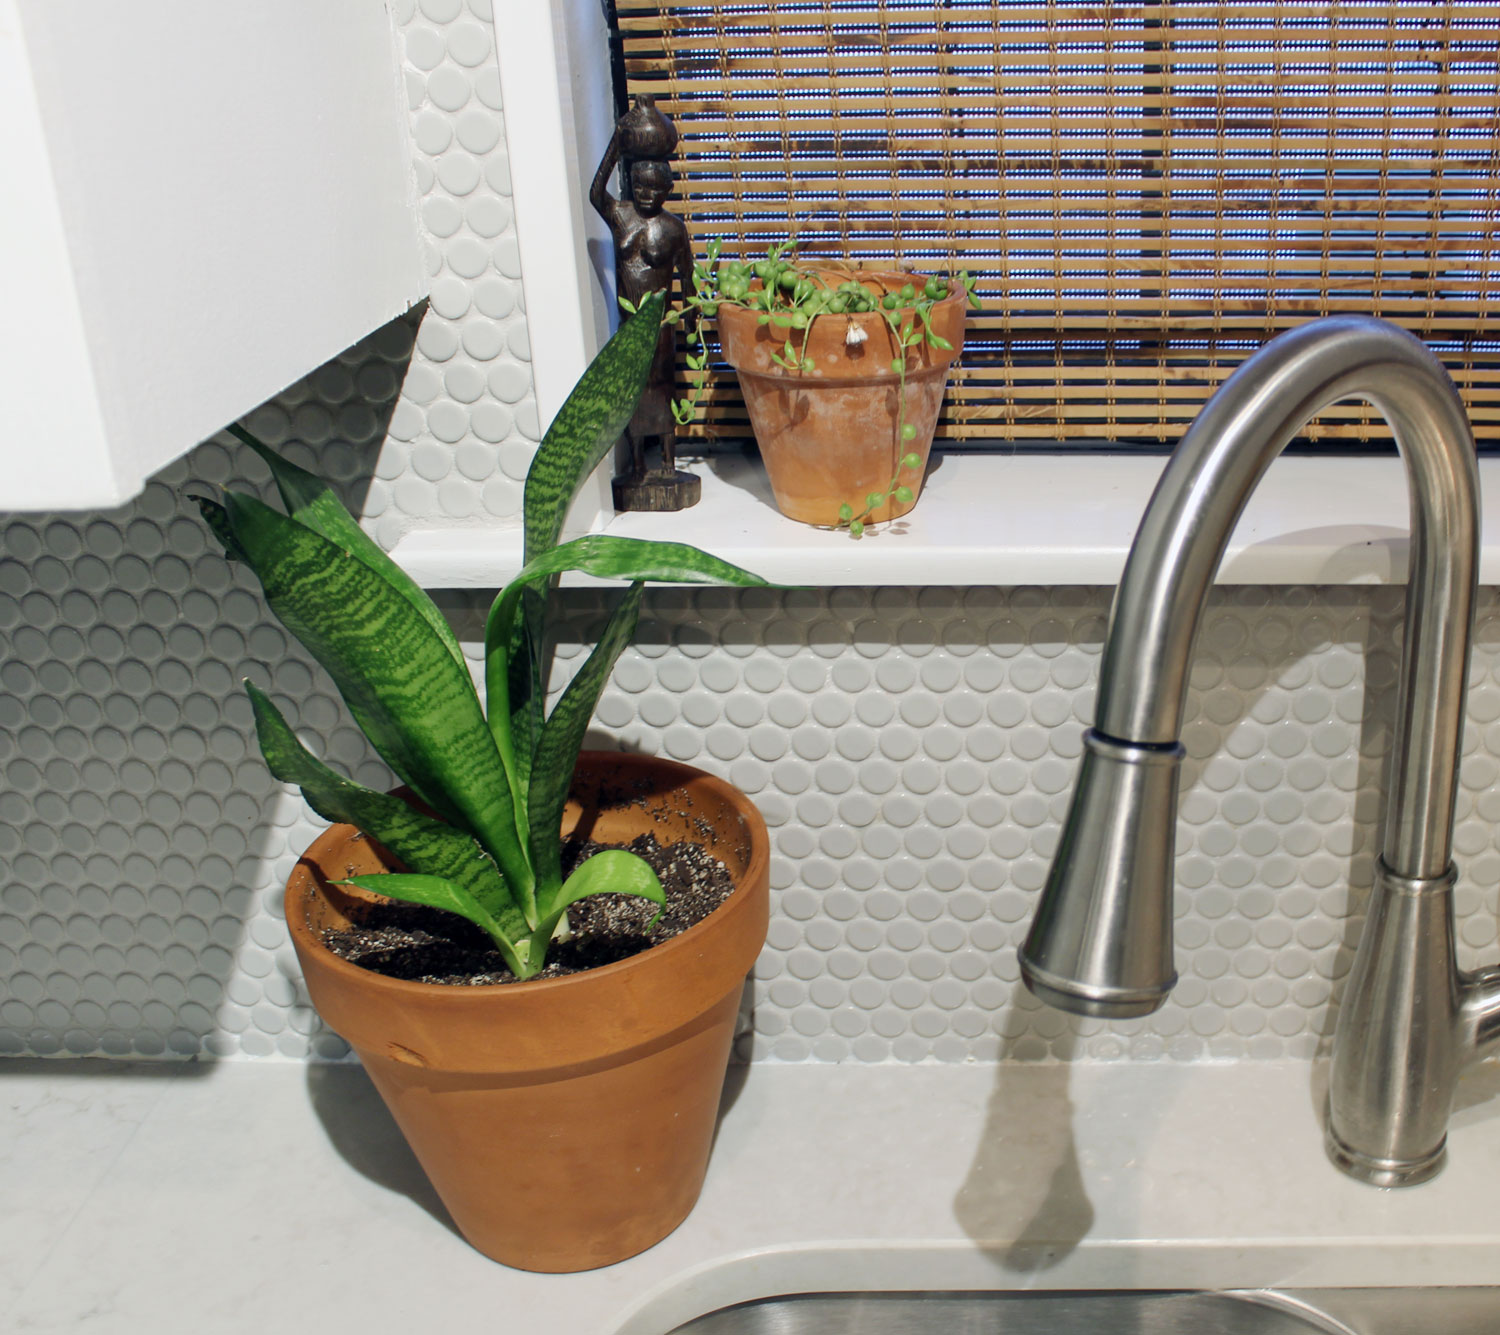
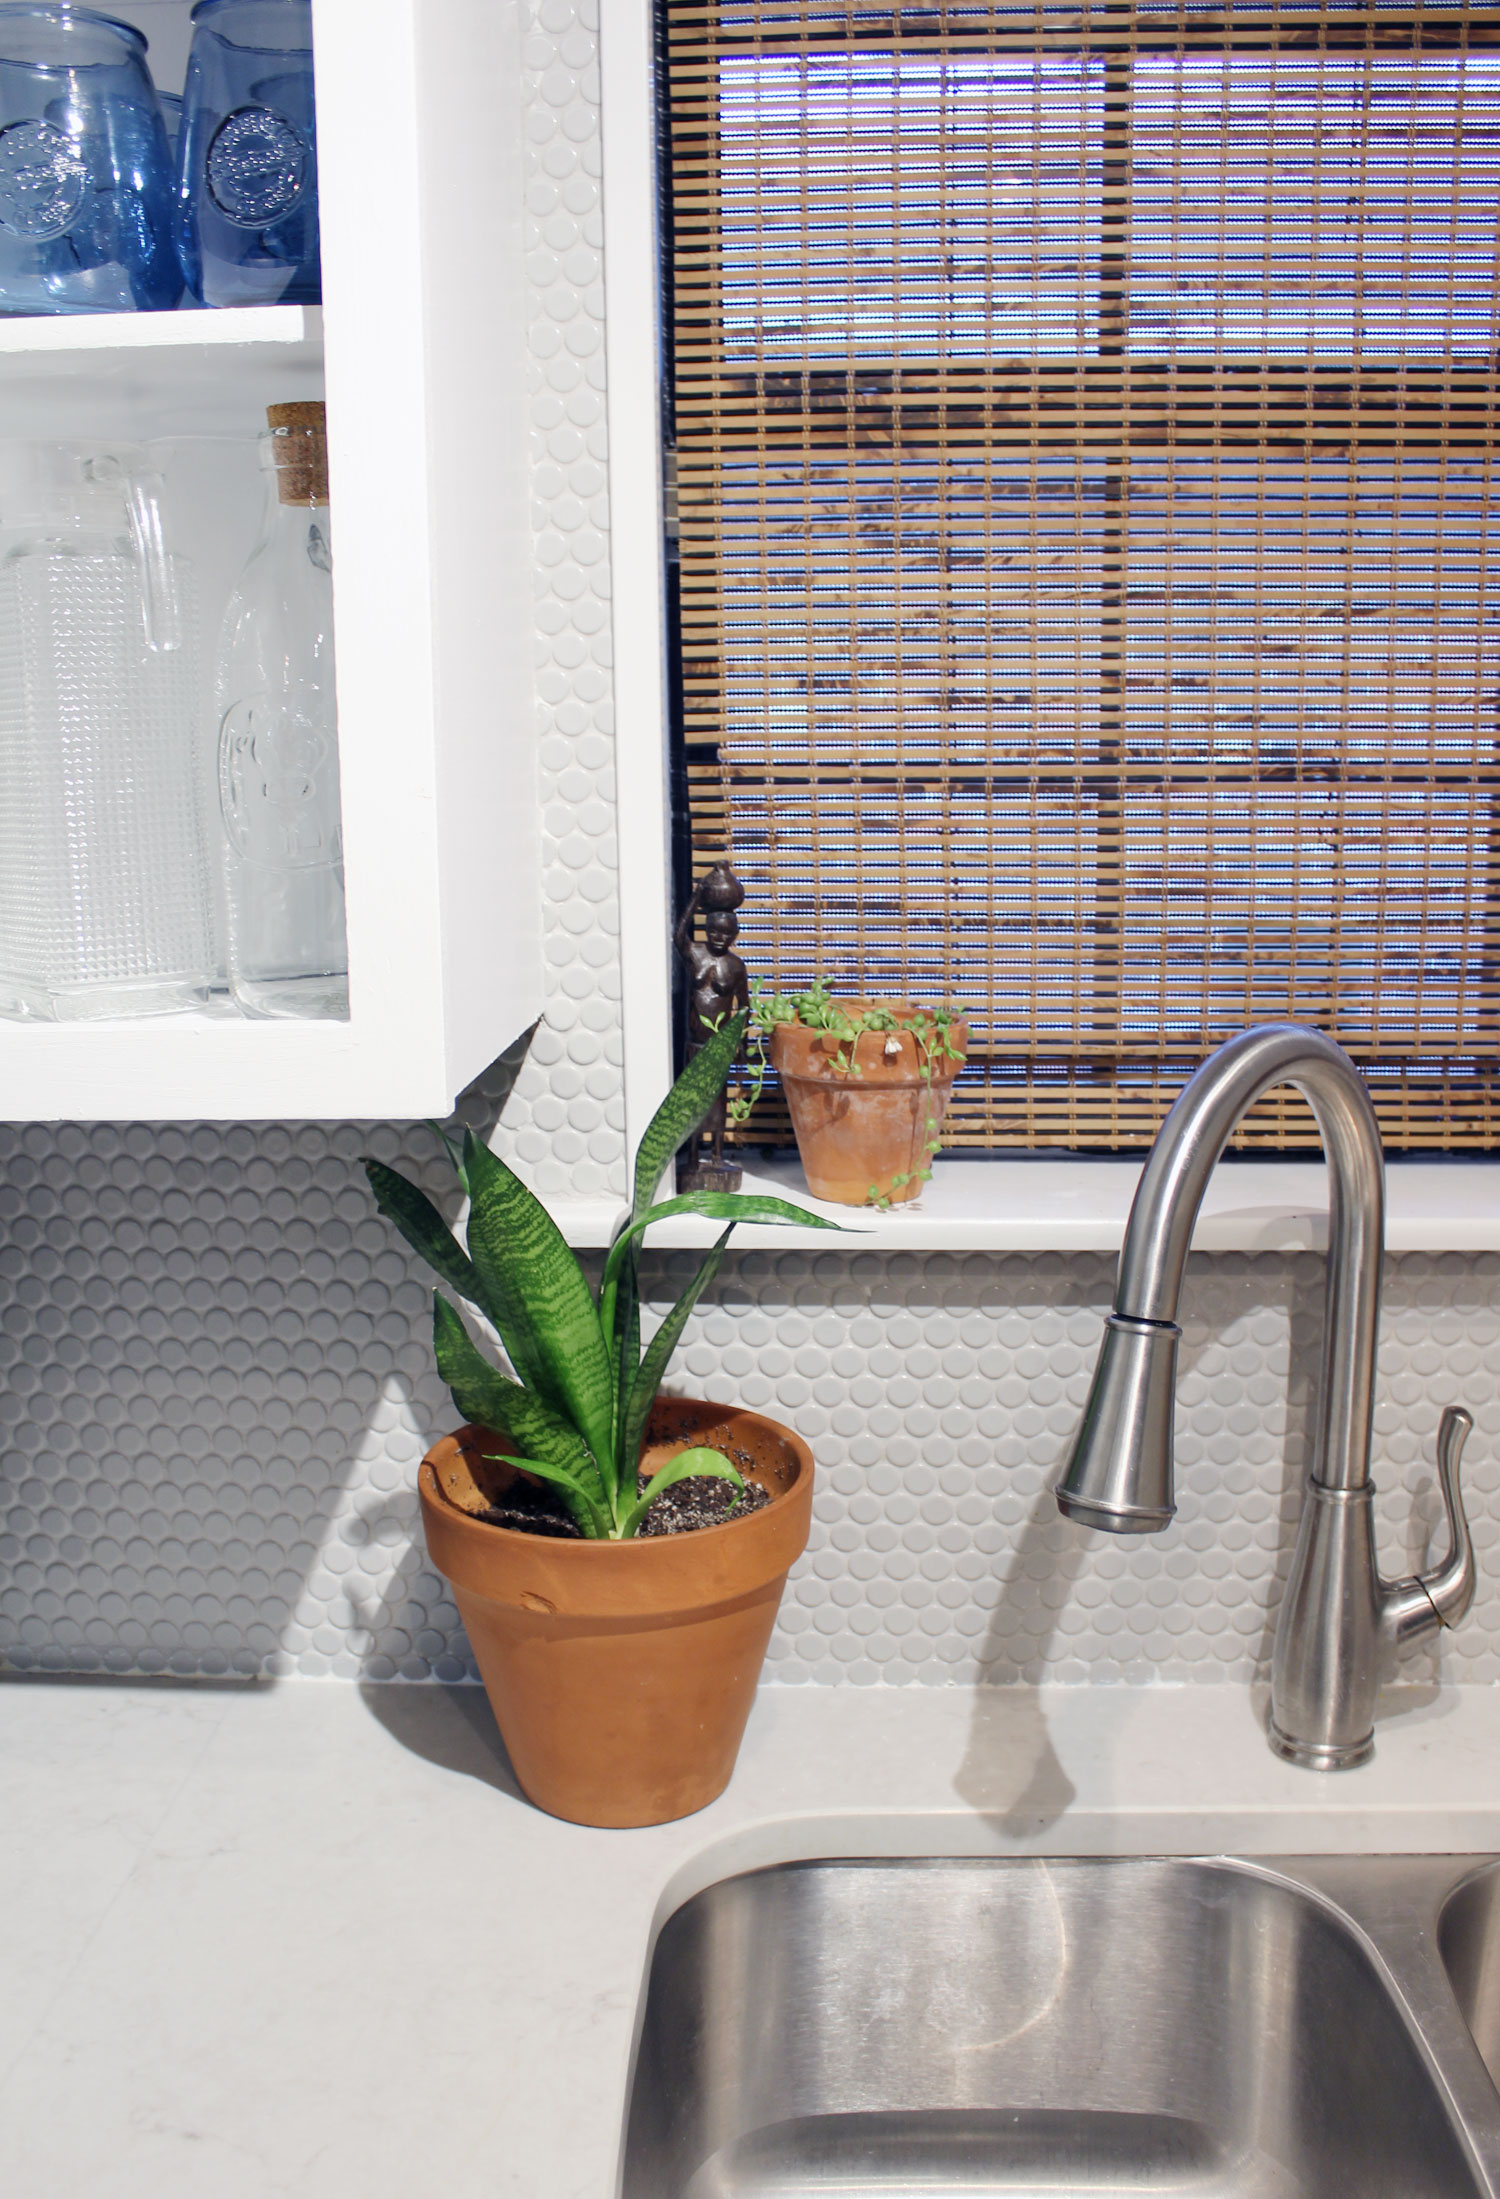
Because the kitchen is so white, I really wanted to warm it up with some wooden accents. So, I opted for the wood blinds, instead of the fabric Roman shades like I wanted to do initially. Then, I further warmed up the small space with some flowers and a snakeplant in a terracotta pot. Eventually, I’ll most likely have lots of plants around that window. I’ve been a bit of a plant hoarder lately.
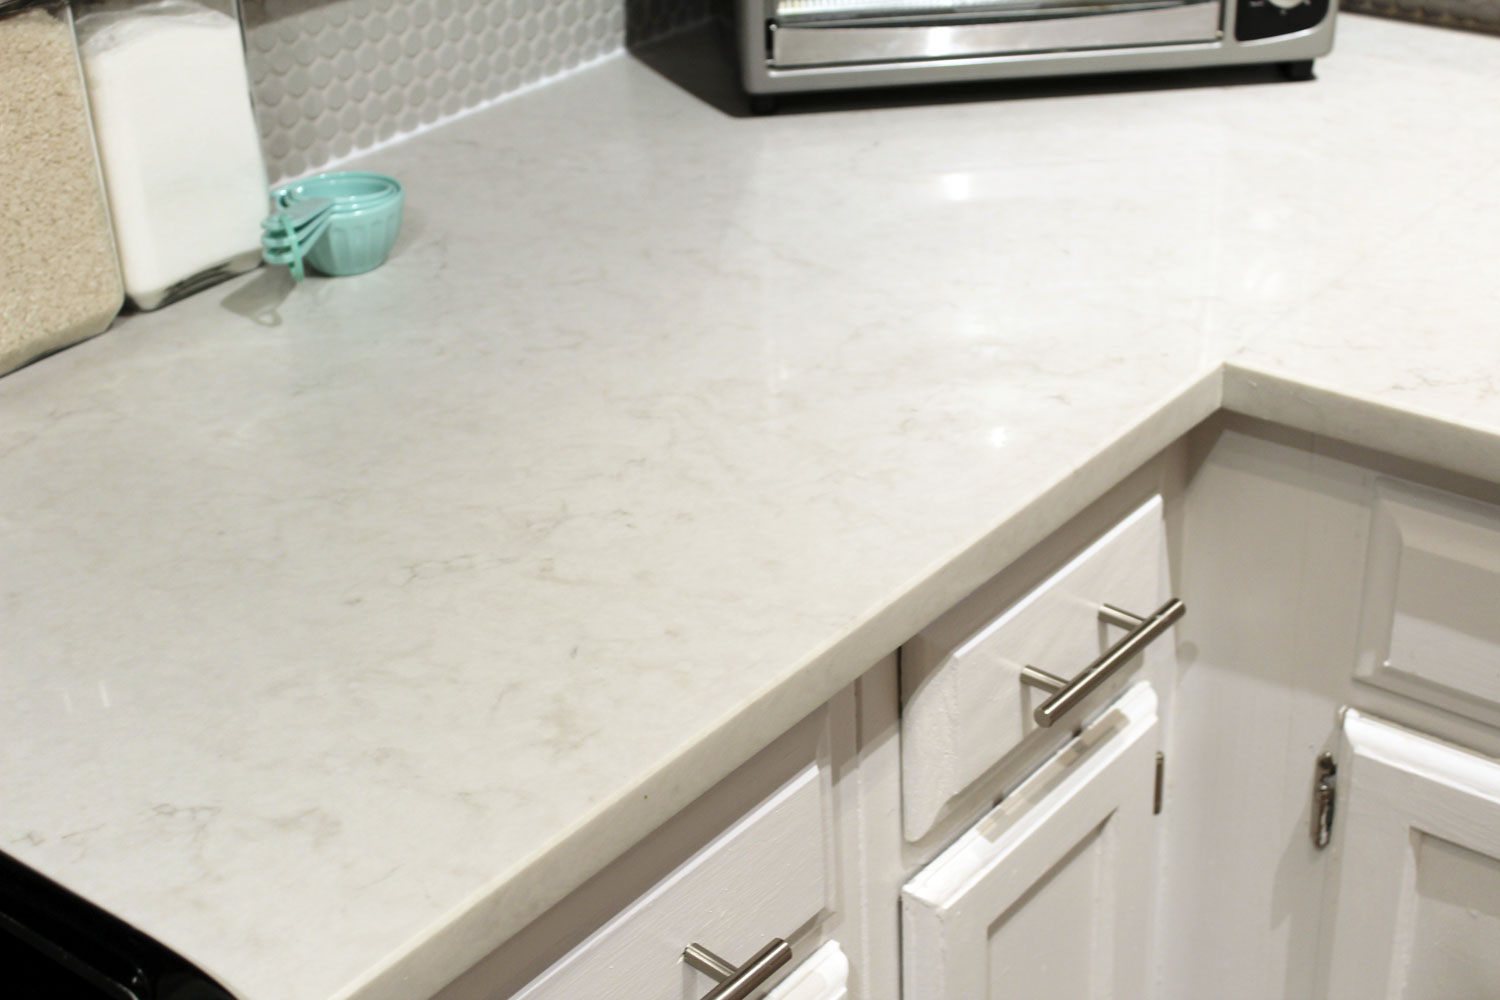
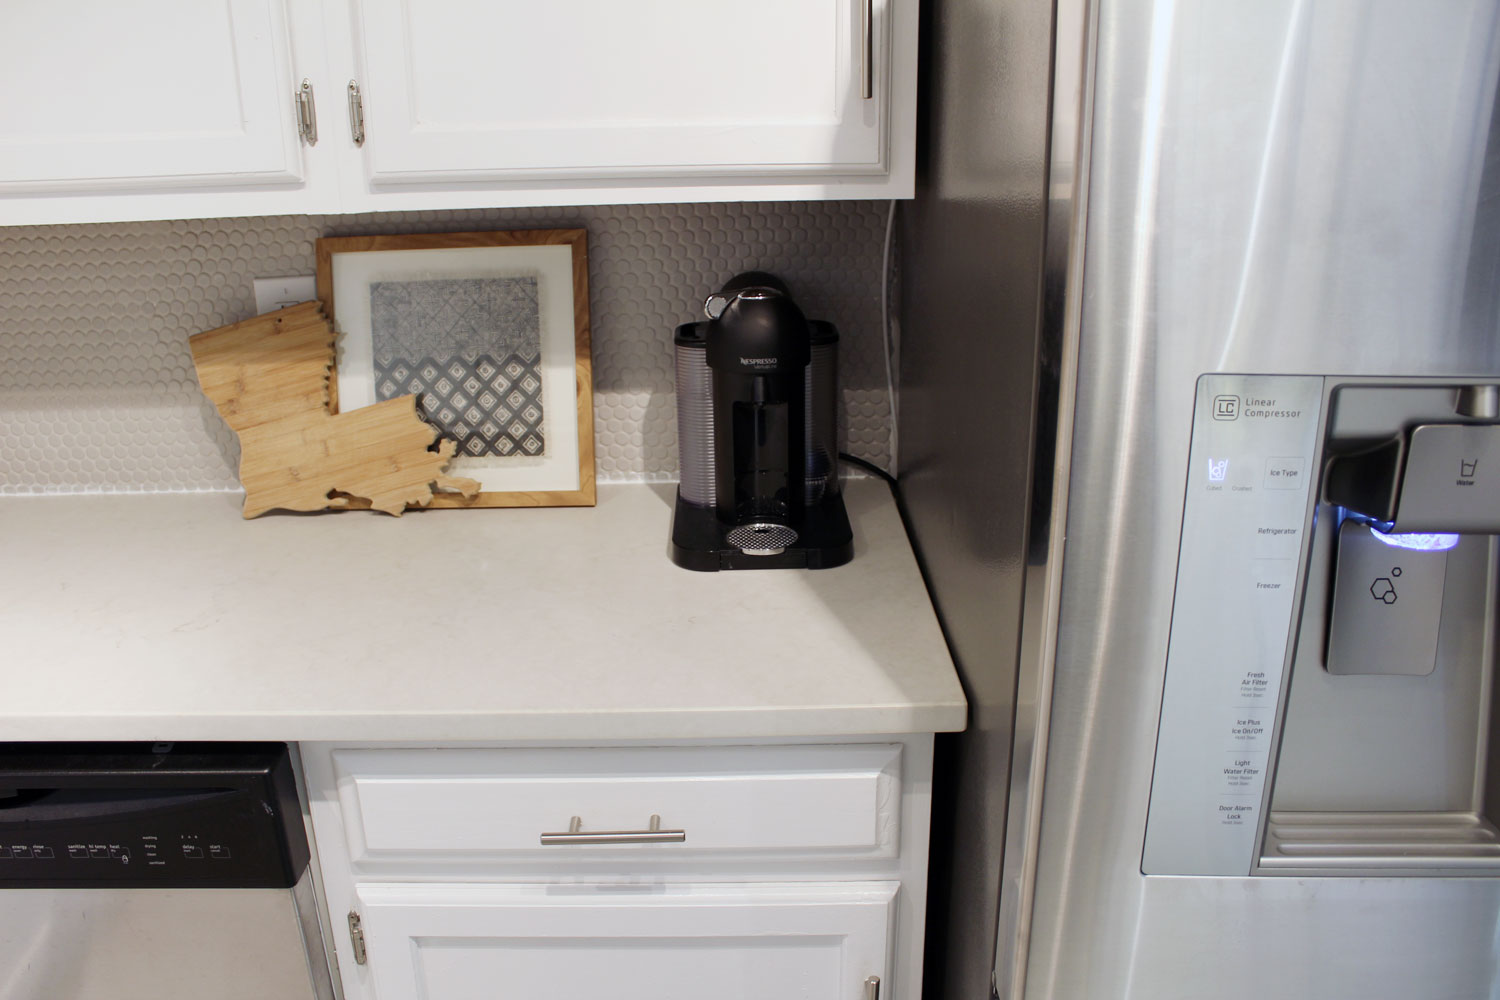
I partnered with Caesarstone on my kitchen project to review their quartz countertops and seriously, my new countertops are my favorite part of the kitchen. They are so beautiful and are perfect for giving my kitchen a classy, classic updated. 3000% better than those laminate tops I’ve had before. I chose the London Grey finish after spending days researching and pondering exactly what color I wanted to go with. I’ll share with you exactly how to choose countertops, what to expect during installation, and how important they are in updating a kitchen or bathroom, in an upcoming post, so stay on the lookout for that. (Now is the time to make sure you’re on my email list and following me on Instagram. Don’t say I didn’t warn you.)
[Tweet “The London Grey @caesarstoneusa countertops were the perfect update to this small, galley kitchen. Check out the before/after!”]I knew when I finally got a house, I wanted Caesarstone countertops, so I was very happy when they agreed to partner with me. Not only are all their countertop finishes beautiful, but they’re also strong and durable. Created from up to 93% natural quartz aggregates, organic pigments and enhanced polymer resins, Caesarstone countertops are heat, stain, scratch and chip resistant! The London Grey finish that I have has a light grayish-white background with varying shades of gray veins in it. Look how beautiful it is!
To bring in a little color to my kitchen, I purchased these beautiful Kate Spade tea towels from Home Goods and this cute rug from World Market. I’m sure I’ll switch these out often, but they were perfect for the Spring! I’ve been all about blues lately.

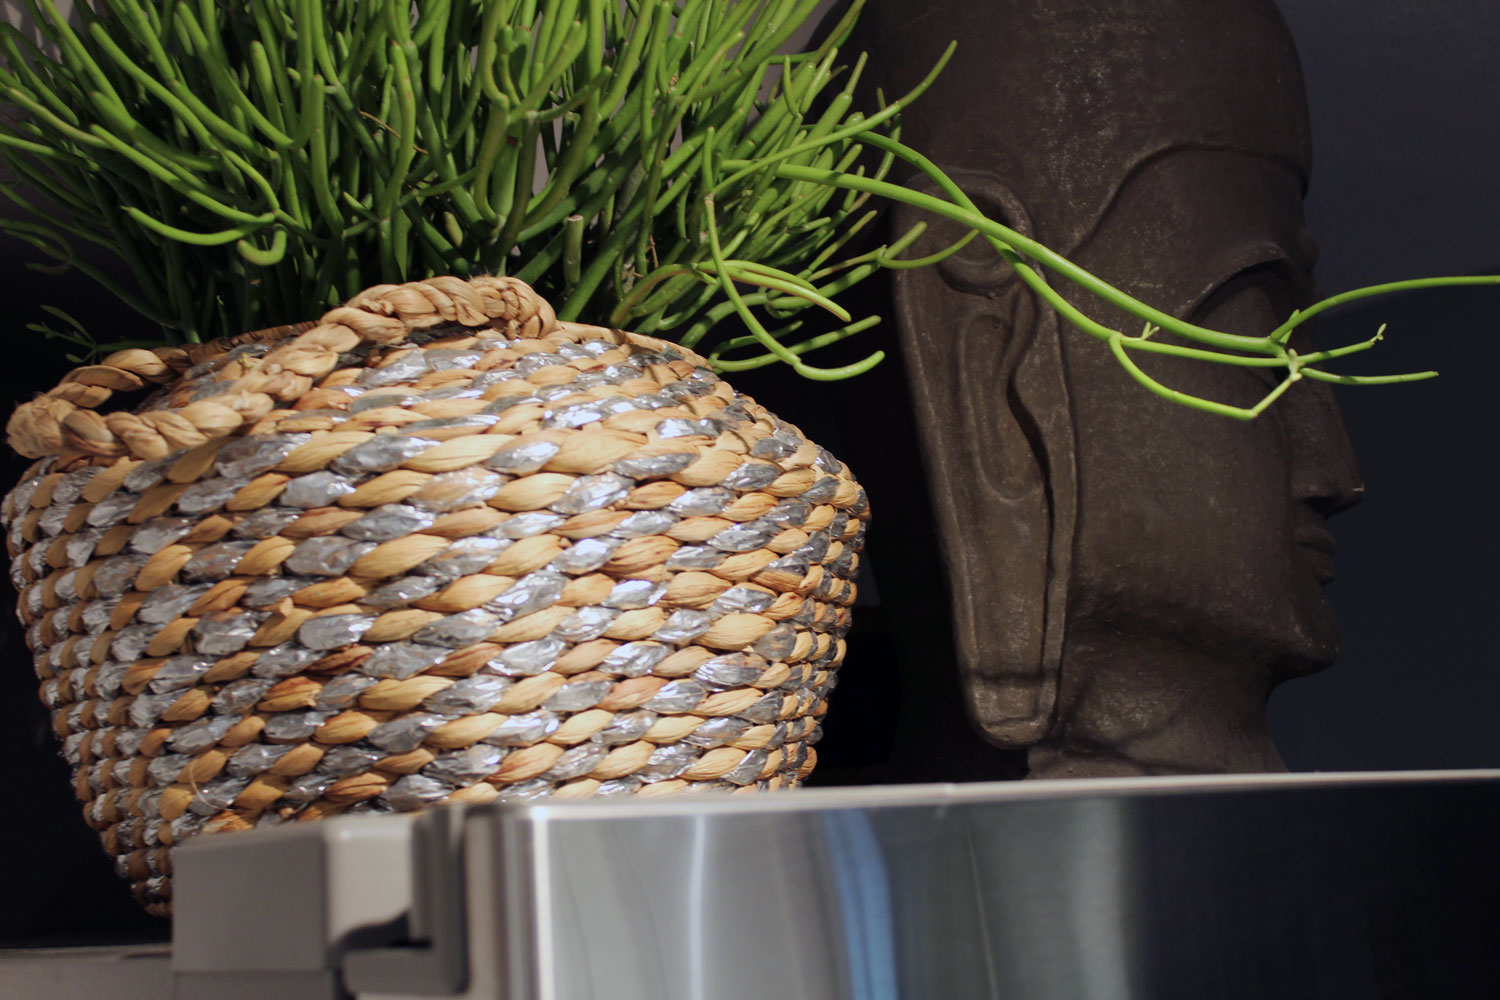
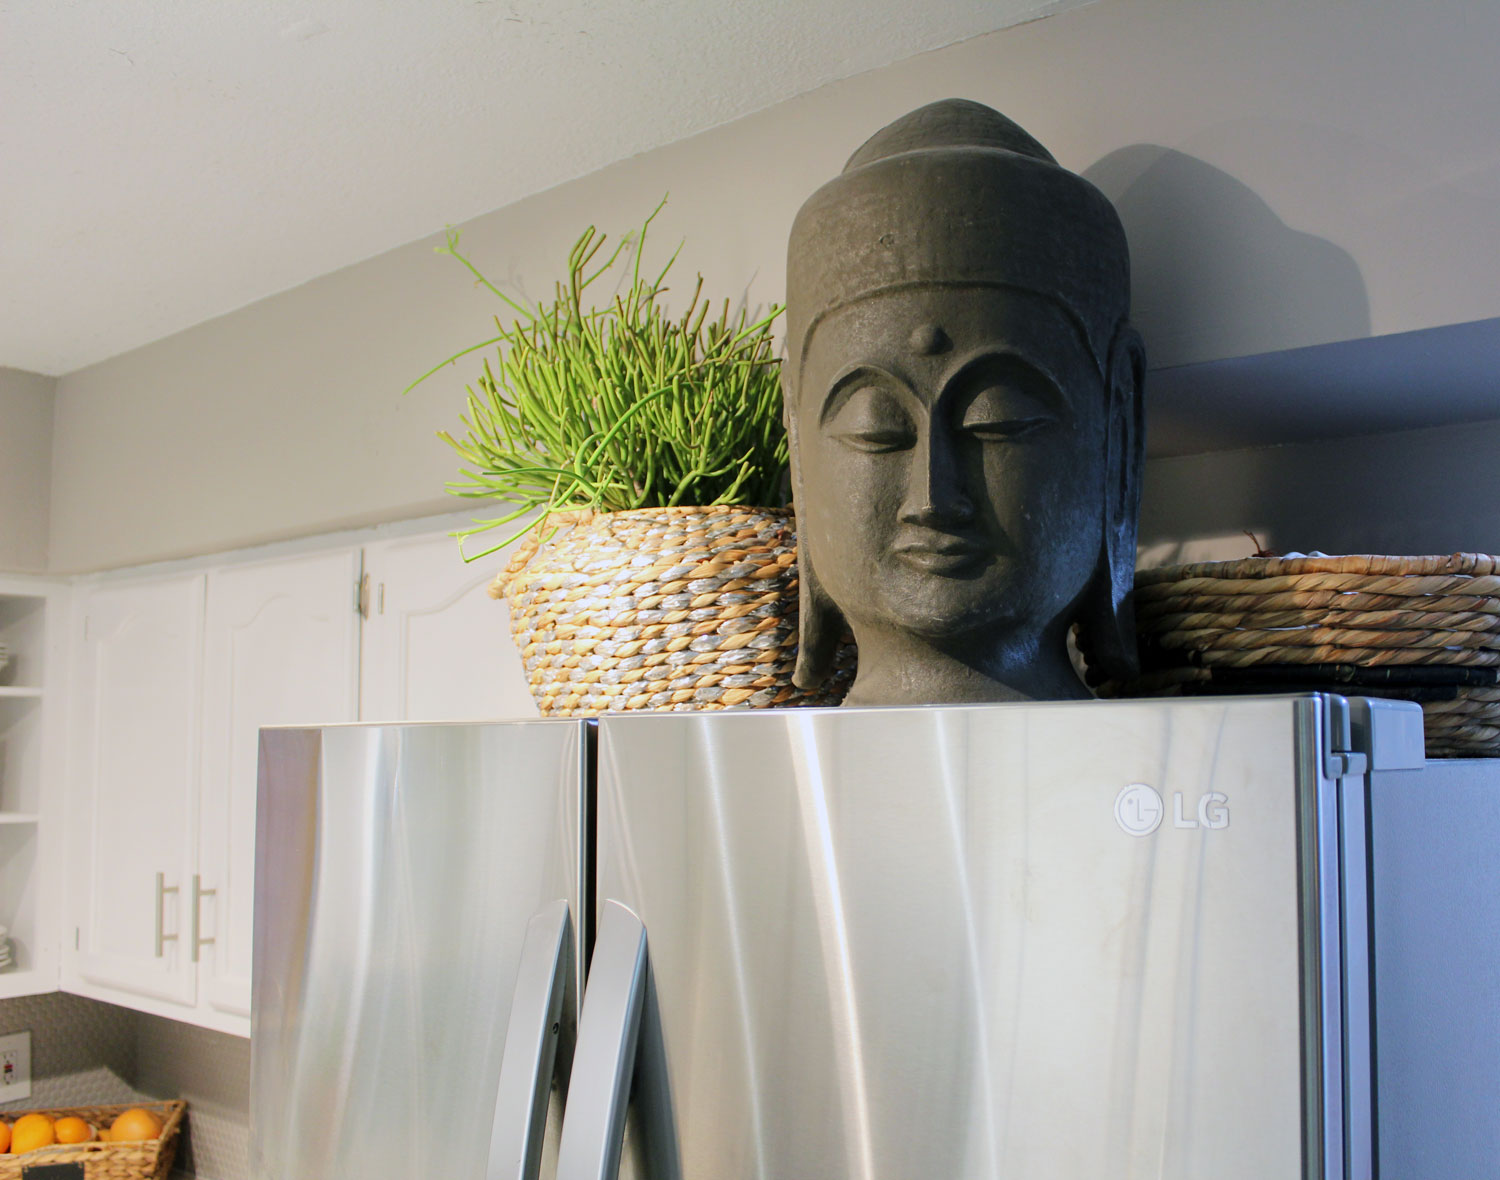
I have my other favorite things (besides my countertops) in my kitchen, too: my “hairy succulent” (because of course I don’t know the name of this plant, LOL) and my oversized buddha.
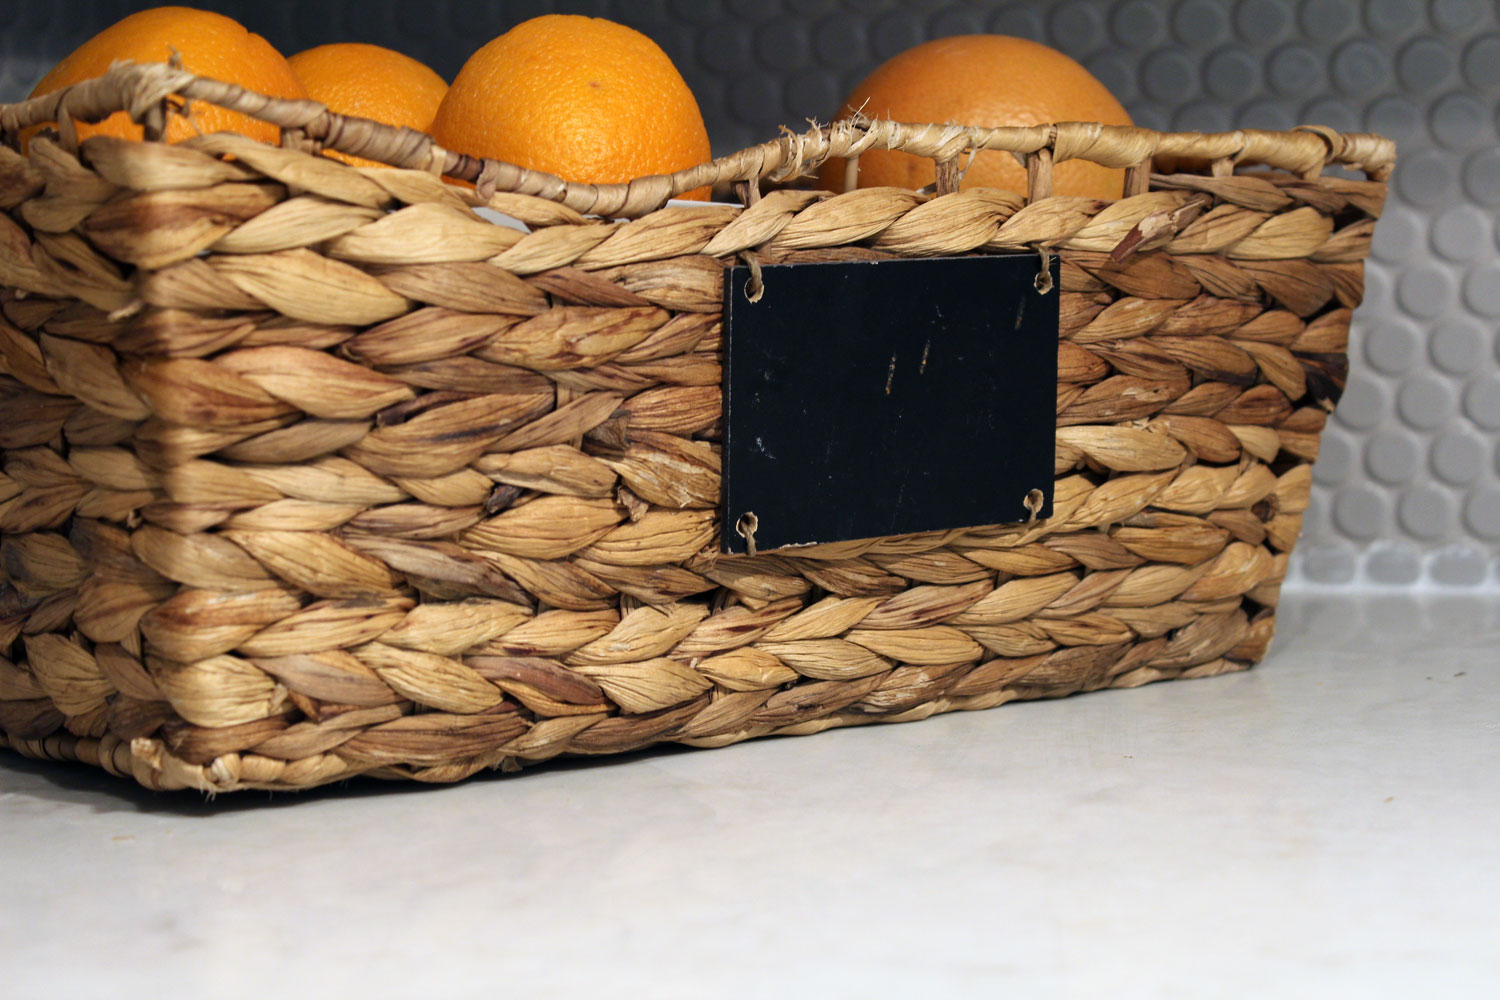
My buddha has been moved all over my last place, but I could never find a good spot for it in the new house. So, when I realized I wanted to put something decorative on the top of my fridge, I knew it was the perfect place for Buddha. I’m not sure where I got the woven basket for the succulent, but it’s so fun and sparkly. I love how it contrasts against the rest of the simple kitchen.
So, what do you think, guys? I have a lot more to share about the “renovation” of my kitchen, so make sure you check back, but I would love to know what you think about the kitchen now. Make sure to (1) leave me a comment below, (2) pin some of the images above to save for later, and (3) slide over to my instagram page to show some love on the images I shared there. Feel free to save some of these to your phone and share on IG, too! Just make sure to tag me!
So, I’d love to hear from you! What’s do you think of the transformation? Leave me a comment below!
Till next time,
![]()


Your kitchen looks great! I’ve been checking your blog weekly waiting for the reveal. The wait was worth it. I love the penny tile backsplash and how you added the woven shades and plants so that the kitchen wouldn’t feel stark and/or cold. Kitchen renovations such as yours give people with older cabinets and moderate budgets hope. Congratulations on a job well done.
Thank you, Darcel! It means so much that you came back to see the transformation and I’m so glad that my mini reno motivates you. You could definitely get a new look with some hardware changes, paint, and a DIY attitude!
Looks great! And the best part is because it’s so neutral you can switch up accessories/color schemes if you ever get bored.
Thank you, Stacy! You’re right, that’s the goal! The white and gray color scheme is really flexible!
Girlfriend this kitchen is fantastic! It’s so fresh and airy.. the countertops are fabulous… between the flooring and painting the kitchen has a bigger feel…job well done! Btw. The plant is a pencil cactus
Thank you so much, Jamala!! I’m so glad you stopped by. And, now I know what my favorite plant is: a pencil cactus! Thank you!
Great kitchen transformation!
Thanks!
This kitchen looks so warm and inviting—definitely a dream space. Loving the clean lines and layout of this kitchen. So functional yet stylish.